發表文章

目前顯示的是 11月, 2020的文章

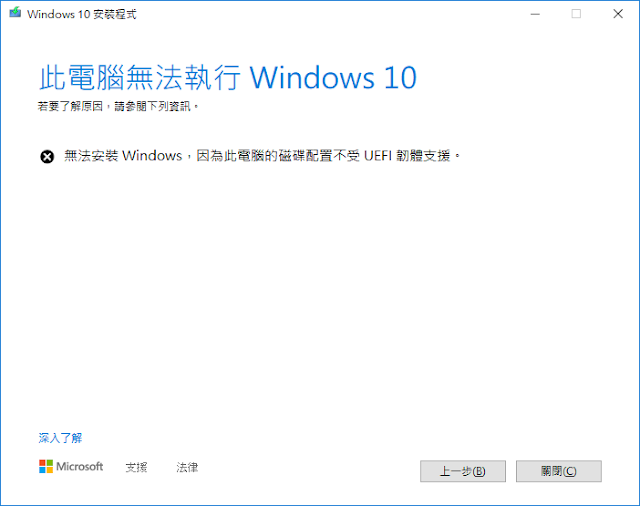
無法安裝Windows,因為此電腦的磁碟配置不受UEFI韌體支援。

圖片
solution 1: fix boot loader with legacy mode in hdd bcdboot c:\windows /f all /s c: /l zh-tw 有人成功過,不過我是不敢去直接對開機碟下這種指令。 所以我去把開機碟在磁碟管理裡壓縮大小,讓出261MB分割給開機管理程式,比如H:。 然後把上面指令下 bcdboot c:\windows /f BIOS /h c: /l zh-tw 依舊是失敗的,不過有人成功過而且有附圖,姑且判定是我自己沒有搞清楚。 solution 2: to find a flash disk with f32, then make a boot management in this flash dis. booting with the flash disk, finally update os. C:\Windows\system32>bcdboot c:\windows /f BIOS /s e: /l zh-tw 開機檔案已順利建立。 使用者這種方法要在BIOS/UEFI裡設定e:所在的Partition開機,而且必須設定UEFI模式開機,跟我們要BIOS+MBR不符,根本無法安裝,提出這個方法的人講得頭頭是道,結果自己沒附圖也沒試,提出者給的指令為 C:\Windows\system32>bcdboot c:\windows /f  legacy /s e: /l zh-tw,根本沒有legacy這個參數。 其實solution很簡單,回歸DOS本心,DOS時代都怎麼設定開機的,不就把OS所在Partition把他Mark成Actvie,然候用BIOS模式開機,這是廢話,因為那個年代沒有UEFI。 ▲ Win10裡已經沒有fdisk,所以也不能下fdisk /mbr,取而代之是diskpart,記得用管理員權限開啟。 ▲ list part 找到OS所在分割,我是放在磁碟分割2,,select part 2選擇磁碟分割2,active標記使用中,這翻譯真的超爛,他就是告訴開機程序要來這找OS碟所做的記號,最後list part就看到還念的星號了,重開機去BIOS/UEFI裡CSM開啟調整legacy模式,重新開機進入OS。 ▲ 系統資訊中看到BIOS模式為舊型。此時就是我們要的BIOS

total-command-centos-mysql-tomcat

vi /etc/sysconfig/network-scripts/ifcfg-ens3 修改IP ifup ens3 vi /etc/hostname 修改主機名稱 cd /etc/yum.repos.d/ cp /etc/yum.repos.d/* bak cp bak/CentOS-Media.repo . vi CentOS-Media.repo 刪除不必要之搜尋路徑 cd /media mkdir CentOS mount -t iso9660 -o loop ~wkh/CentOS-Stream-8-x86_64-20201030-dvd1.iso /media/CentOS/ yum install mysql-server service mysqld start mysql create database sqmc; mysql sqmc < ~wkh/ECC-SQMC/sqmctest.sql cd /opt tar zxvf apache-tomcat-9.0.39.tar.gz mv apache-tomcat-9.0.39 tomcat-9 groupadd tomcat useradd -g tomcat tomcat chown -R tomcat:tomcat tomcat-9 vi /lib/systemd/system/tomcat.service service tomcat start ln -s /usr/lib/systemd/system/tomcat.service /etc/systemd/system/multi-user.target.wants/tomcat.service

using-dvd-iso-to-update-yum-centos-8

mount -t iso9660 -o loop ~wkh/CentOS-Stream-8-x86_64-20201030-dvd1.iso /media/CentOS/ cd /etc/yum.repos.d/ vi CentOS-Stream-Media.repo ----- # CentOS-Stream-Media.repo # # You can use this repo to install items directly off the installation media. # Verify your mount point matches one of the below file:// paths. [media-baseos] name=CentOS Stream $releasever - Media - BaseOS baseurl=file:///media/CentOS/BaseOS #        file:///media/cdrom/BaseOS #        file:///media/cdrecorder/BaseOS gpgcheck=1 enabled=1 gpgkey=file:///etc/pki/rpm-gpg/RPM-GPG-KEY-centosofficial [media-appstream] name=CentOS Stream $releasever - Media - AppStream baseurl=file:///media/CentOS/AppStream #        file:///media/cdrom/AppStream #        file:///media/cdrecorder/AppStream gpgcheck=1 enabled=1 gpgkey=file:///etc/pki/rpm-gpg/RPM-GPG-KEY-centosofficial #ln -s /run/media/wkh/CentOS-Stream-8-x86_64-dvd /media/CentOS 更改到其他mirror版本時,執行以下重建yum資料庫 su - yum clean all  rpm --rebuilddb yum update

modify-datafile-location-of-mysql

#/etc/my.cnf設定檔 -# # # This group is read both both by the client and the server # use it for options that affect everything # [client-server] # # include all files from the config directory # !includedir /etc/my.cnf.d # cd /etc/my.cnf.d #vi mysql-server.cnf [mysqld] datadir=/var/lib/mysql  <=== modify this line #datadir=/mysqldata socket=/var/lib/mysql/mysql.sock log-error=/var/log/mysql/mysqld.log pid-file=/run/mysqld/mysqld.pid #mysql資料檔存放位置 group owner都要是mysql 權限755 #service mysqld start # ps -ef | grep mysql mysql       4816       1  5 21:05 ?        00:00:01 /usr/libexec/mysqld --basedir=/usr root        4907    4541  0 21:05 pts/0    00:00:00 grep --color=auto mysql # mysql -u root -p Enter password:[enter] 預設無密碼 mysql> show databases; +--------------------+ | Database | +--------------------+ | information_schema | | mysql | | performance_schema | | sys | +--------------------+ 4 rows in set (0.00 sec) # mysql -usqmc mysql> show da

Forget-password-of-mysql

 #/etc/rc.d/init.d/mysqld stop #/usr/bin/mysqld_safe --skip-grant-tables & 即可不需密碼進入 Mysql

install-tomcat-9-in-CentOS-8

#export http_proxy="http://sproxy.cht.com.tw:8080/" # dnf install -y java-11 apr openssl 上次中介資料過期檢查:23:39:05 以前,時間點為西元2020年11月17日 (週二) 16時43分26秒。 已安裝軟體包 openssl-1:1.1.1g-11.el8.x86_64。 依賴關係解析完畢。 ================================================================================  Package                  Arch   Version                        Repo       Size ================================================================================ 安裝:  apr                      x86_64 1.6.3-11.el8                   appstream 125 k  java-11-openjdk          x86_64 1:11.0.8.10-6.el8              appstream 251 k 將安裝依賴項目:  copy-jdk-configs         noarch 3.7-1.el8                      appstream  27 k  java-11-openjdk-headless x86_64 1:11.0.8.10-6.el8              appstream  40 M  javapackages-filesystem  noarch 5.3.0-1.module_el8.0.0+11+5b8c10bd                                                                 appstream  30 k  lksctp-tools             x86_64 1.0.18-3.el8                   baseos 

update-after-instal-centos-8-stream

 # dnf install -y centos-release-stream 會安裝AppStream BaseOS Extras....and so on #yum -y install gcc install gcc compiler #yum -y install mysql install the client #yum -y install mysql-server install the server 一、啟動方式 1、使用 service 啟動:service mysqld start 等同執行 systemctl start mysqld.service 2、使用 mysqld 指令碼啟動:/etc/inint.d/mysqld start 3、使用 safe_mysqld 啟動:safe_mysqld&; 4 #sudo systemctl enable mysqld???? 設定重開起動? 二、停止 1、使用 service 啟動:service mysqld stop 2、使用 mysqld 指令碼啟動:/etc/inint.d/mysqld stop 3、mysqladmin shutdown 三、重啟 1、使用 service 啟動:service mysqld restart 2、使用 mysqld  指令碼啟動:/etc/inint.d/mysqld restart start service 安裝後執行 mysql_secure_installation 腳本, 會設定幾個跟安全有關的設定: 我是先跳過,免得被卡住。 完成設定後, 執行 mysql 嘗試登入 MySQL: $ mysql -u root -p 如果可以成功能登入, 便表示 MySQL 8.0 已經安裝完成.

centos-8-install-development-tools

 install c/c++ compiler #yum group install "Development Tools" remember that the connection must be fine. proxy nameserver interface

centos-8-enable-network-interface

 #cd /etc/sysconfig/network-scripts/  #vi ifcfg-enp0s3 看要開啟哪個介面直接編輯設定檔 ONBOOT改成yes #service network restart 執行後說network.service not found #ifup enp0s3 成功

將tiny core linux安裝到local disk

 下載來的tiny core linux是免安裝的iso file, 每次重開機所有的設定都不恢復原狀 1. set the password of root sudo su password How to get into root : sudo su Default user is tc and password is not set for the user to set the password for tc user use following command : passwd Change ip address of interface in tiny core: ifconfig eth0 10.1.1.1 netmask 255.255.255.0 Give default route in tiny core: route add default gw 10.1.1.2 route add -net 10.2.2.0 netmask 255.255.255.0 gw 10.1.1.1 Install open ssh in tiny core : Install openssh: tce-load -w -i openssh Create the password for user tc: passwd tc cd /usr/local/etc/init.d/ ./openssh start Web server on tiny core : tce-load -wi busybox-httpd.tcz Change directory to "/usr/local/httpd/bin" Specify index file of the website ./busybox httpd -p 80 -h /usr/local/httpd/bin/ vi index.html webpage How to set dns server ip for tiny core ? Edit the file in directory "/etc" resolv.cofig and add the dns server as follow nameserver 2. install into hard d

11.15 CentOS 8 Single User mode

 boot到grub時按e編輯任一個項目 在第二行的ro改成rw 行尾加上single 按ctrl-x可以reboot進入系統 輸入root password或者按ctrl-D直接進入 但是虛擬機管理介面如果沒有tty1時 無法進入

Resin網頁伺服器執行lsof -i:8080 命令出現大量的ESTABLISHED連接

  Resin服務的端口為8080,執行lsof -i:8080 命令出現大量的ESTABLISHED連接: 然後執行netstat -n | awk '/^tcp/ {++y[$NF]} END {for(w in y) print w, y[w]}' 命令發現存在大量狀態為TIME_WAIT的連接: 簡單來說, ESTABLISHED 表示正在進行網絡連接的數量, TIME_WAIT 表示表示等待系統主動關閉網絡連接的數量, CLOSE_WAIT 表示被動等待程序關閉的網絡連接數量,因此TIME_WAIT跟服務器的配置有關,而CLOSE_WAIT跟程序進行網絡連接有關了,通常是程序沒有主動關閉網絡連接所致。 上圖中顯然TIME_WAIT的數量太多了,需要對服務器進行配置。 對/etc/sysctl.conf 文件做如下設置(包含每個配置項的說明): //*对于一个新建连接,内核要发送多少个 SYN 连接请求才决定放弃,不应该大于255,默认值是5,对应于180秒左右时间 net.ipv4.tcp_syn_retries= 2 #net.ipv4.tcp_synack_retries=2 //表示当keepalive起用的时候,TCP发送keepalive消息的频度。缺省是2小时,改为300秒 net.ipv4.tcp_keepalive_time= 1200 net.ipv4.tcp_orphan_retries= 3 //表示如果套接字由本端要求关闭,这个参数决定了它保持在FIN-WAIT-2状态的时间 net.ipv4.tcp_fin_timeout= 30 //表示SYN队列的长度,默认为1024,加大队列长度为8192,可以容纳更多等待连接的网络连接数。 net.ipv4.tcp_max_syn_backlog = 4096 //表示开启SYN Cookies。当出现SYN等待队列溢出时,启用cookies来处理,可防范少量SYN攻击,默认为0,表示关闭 net.ipv4.tcp_syncookies = 1 //表示开启重用。允许将TIME-WAIT sockets重新用于新的TCP连接,默认为0,表示关闭 net.ipv4.tcp_tw_reuse = 1 //表示开启TCP连接中T

open ftp service in HPUX

 1,修改/etc/inetd.conf檔案 ftp          stream tcp6 nowait root /usr/lbin/ftpd     ftpd -l 1. Modify  /etc/services  to add FTP ports. The following example shows two additional data ports,  ftp2  and  ftp3  added:     ftp-data      20/tcp                 # File Transfer Protocol (Data)     ftp           21/tcp                 # File Transfer Protocol (Control)     ftp2          5802/tcp                 # File Transfer Protocol Test delete # in the head of a line。      2. Modify  /etc/inetd.conf :     ftp     stream tcp nowait root /usr/lbin/ftpd      ftp2    stream tcp nowait root /usr/lbin/ftpd  ftpd -l  3. Run  inetd -c , so  inetd  sees the new configuration. 4. Verify that  /etc/nsswitch.conf  exists option 5,restart inetd  #/sbin/init.d/inetd stop Internet Services stopped #/sbin/init.d/inetd start Internet Services started You MUST remember the connect will be broke whe stop is executed, and you should run the in console. method ii: standalone mod /usr/lbin/ftpd -S -l -C 2000 -c 580